DRAINS: planning
Moving the drains was the single most daunting aspect of the entire project. I don't do plumbing, particularly intervening in old plumbing that works just fine. The drains just seemed like a big scary piece of heavy duty underground stuff that was probably best left untouched. But, as with most other bits of the project, once I started researching, it was much more straightforward than I had anticipated. There is the usual clear set of rules about what you can and can't do and the bits of drain actually slot together really easily. The only tricky bits were the joins at the top and bottom but once the pipes were exposed and cut that was pretty straightforward too.
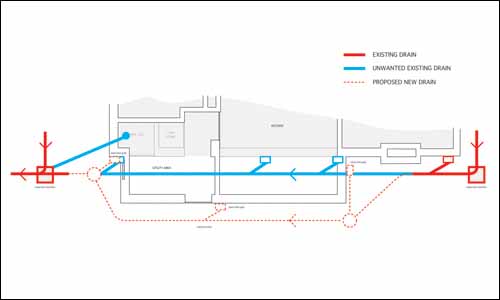 July 2008: This was the final approved version of the plan for the drains.
The specification and plans for moving the drains had been approved when the building inspector came to look at the floor slab. I had modified and simplified the original plans based on some earlier discussions and bought some samples to make sure that I was using the correct materials. One issue that came up is a rule that means my rainwater had to run into a soak away on the front lawn. It was decided that I could make an argument that this was impractical due to some distances and the trees around the house. After some discussions with Wessex Water my application for dispensation was accepted. This would reduce costs and avoid a considerable amount of work.
All the bits for the drains seemed to be pretty standard and interchangeable. I went for Osma in the end. They are slightly pricier but seemed to be a bit tougher than some of the other makes, particularly the inspection chambers. I was surprised how much the bits for the drains cost. The materials for my fairly modest bit of drainage came to about £750 including £70 for two bulk bags of gravel.
There are two basic rules with drains. Stuff must flow downhill and you need to be able unblock the pipes. There are also specific elements that are needed where one thing meets another, for example the "back inlet gulleys" for the waste outlets. These are basically just giant sink traps and prevent any odour heading in the wrong direction. You need to be able to rod your drains if they get blocked so you must install inspection chambers at junctions and bends. My design allowed for some slow bends (slightly curved pipes) and an equal junction (joining two pipes of the same diameter) for the rainwater. The whole system from top to bottom must have a fall of about 1 in 40 and be bedded in 10 mm gravel. All the spec for the drains is in Section H of the regs. Once the plan had been signed off it was just a case of marking out the trenches and digging.
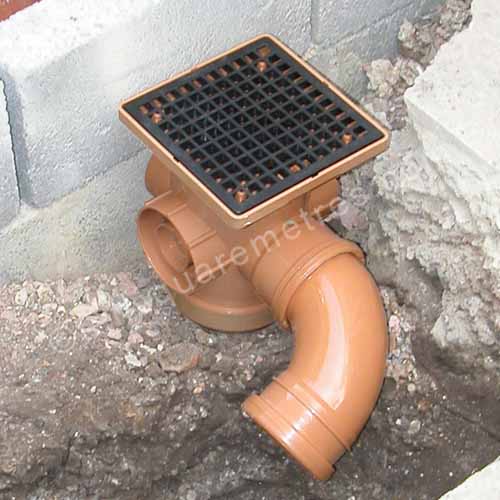 July 2008: We used Osma parts for our drains. This is the back inlet gully for the sink waste from the new kitchen.
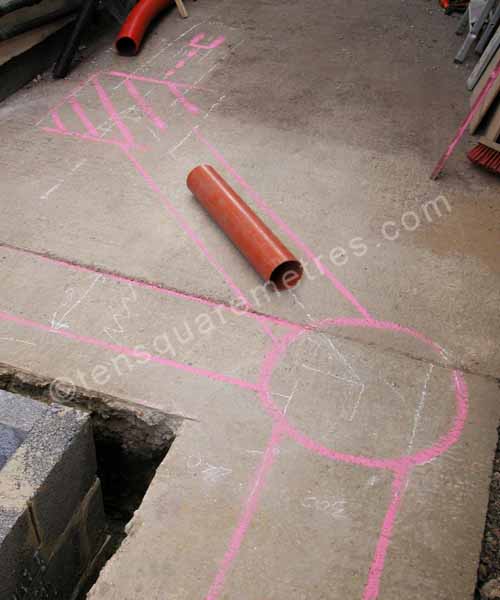 July 2008: Plotting out the route for the drains. We didn't use an inspection chamber right at the top in the end, just a slow bend.
If you have found this website useful please tweet / like / etc... and pass it on!
© 2010- tensquaremetres.com | Privacy | Search | Contact | About