ROOF: structure
There were two points in the project where I had to really drag myself along to keep going with this extension. One was when I had to start digging the drains (fear) and the other was starting the roof structure (momentum). We had put the project to sleep at the end of 2008 and I found it quite difficult to start again after such a long break. It was also quite depressing to see the walls just sit there unchanged through the winter months after such a dynamic and exciting start. This was planned. It wouldn't really have been practical to do anything during the winter while working full time. This website is primarily intended as a resource for people who might be considering a self build project of their own. You really need to think about what time you have available and decide if you can maintain the motivation over a long period. At this stage in my project, spring 2009, there was still another year to go. I was able to work inside and keep things moving through the second winter but I can't honestly say that I was very enthusiastic. In the final few months up to Easter 2010 the end was in sight, but that was about it. We completed our build exactly on schedule. It would have been extremely difficult if that schedule had started to drift.
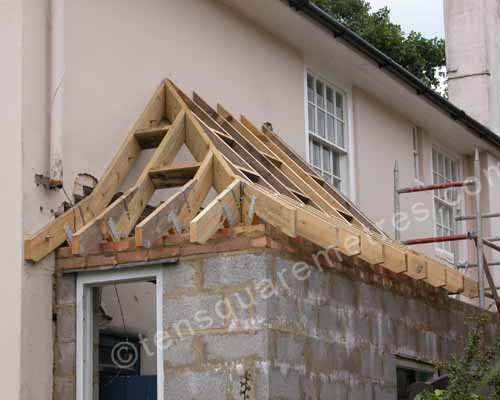 June 2009: The rafters sit on the the wall plate with "bird's mouth" joints (notches) and there is another wall plate fixed to the wall at the top. The end rafter is also bolted to the wall.
At first the roof structure seemed an extremely complicated proposition but (as with most stages of this project) once it was broken down into a specific set of problems it was just a case of researching and asking questions. Apart from the geometry of the cuts my roof was actually quite a simple lean-to. The rafters sit on the the wall plate with "bird's mouth" joints (notches) and there is another wall plate fixed to the wall at the top. The end rafter is also bolted to the wall. All the wall fixings used 12 mm expansion bolts. You drill a big hole, slot them in and then as the nut tightens the bolt expands and grips the hole.
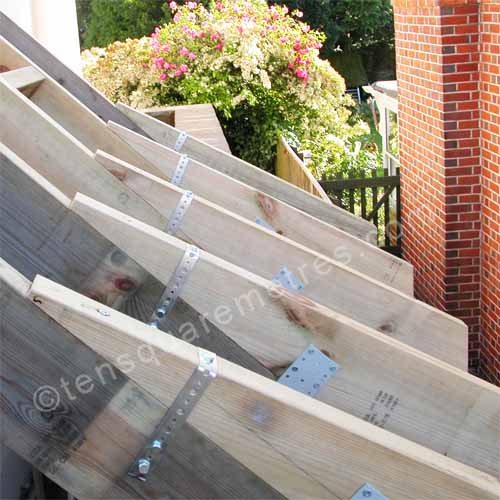 June 2009: Sprocketed, bell or swept eaves are simply where the rafters have an additional fillet of wood fixed on top to change the pitch.
The fillets on the rafters were fixed with countersunk hexagonal coach screws and metal straps. There are various bits of ironmongery for fixing your roof together. There are straps to hold the roof to the wall and "joist hangers" for the horizontal ceiling beams. The best thing is to go along to a builder's merchant and look at all the bits. You also need to make sure you cut the ends of the rafters for your barge boards and soffit. The soffit on our existing roof slopes down to the wall so we needed to match the angles to allow for this. The pitch and height of the roof structure will also set the width and height of your soffit. This needed to be quite accurate for us because we needed the new shutter to sit right underneath the soffit in keeping with the ones on the house.
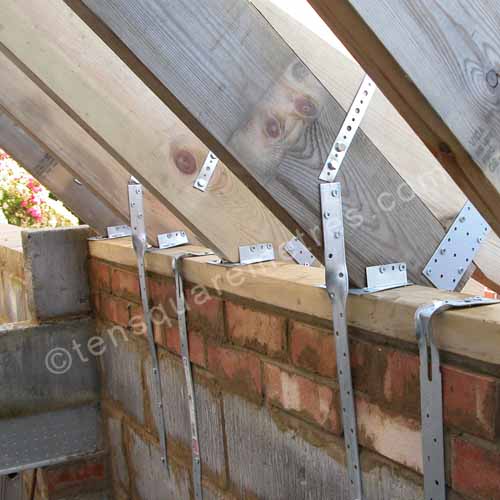 June 2009: There are various bits of ironmongery for fixing your roof together. There are straps to hold the roof to the wall and "joist hangers" for the horizontal ceiling beams.
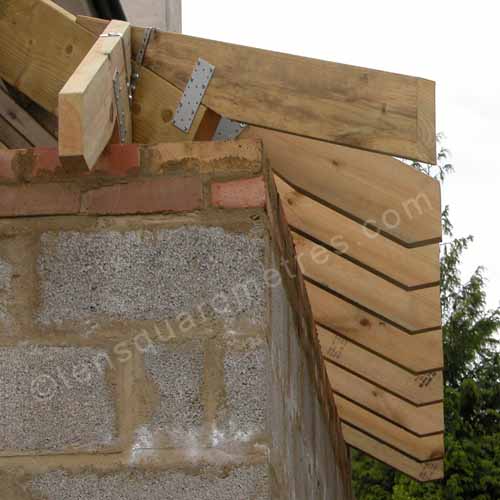 June 2009: The ends of the rafters are the main fixing points for the tongue and groove.
If you have found this website useful please tweet / like / etc... and pass it on!
© 2010- tensquaremetres.com | Privacy | Search | Contact | About